Branchline Trains: N Scale - Majestic Theater
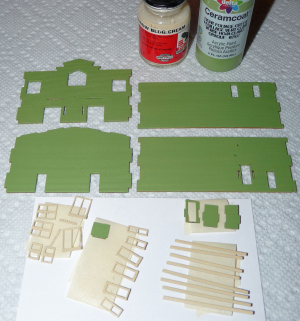
12/17/12 - I managed to get this kit for a very good price on Ebay. The first thing I did was look online for color photos of old wood theaters. I had better luck with later buildings, and came to the conclusion that a bright color would work well. I settled on Ceramcoat's Light Foliage Green with Poly Scale D&RGW Building Cream trim. The scheme was inspired by one of the photos I found online.
I painted the four sides with multiple coats of green. The walls are of a decent thickness, so there was very little, if any, warpage. Just in case, while still slightly damp, I sandwiched the walls between slips of white paper and used stacks of VCR cassettes as weights to keep them flat while drying.
I started to remove certain window, door, and other trim parts from the carrier sheets, and did a little cleaning of the edges with a nail file. I then painted them with the cream color. Most parts needed multiple coats to get good coverage.
12/18/12 - Today I determined that the kit's instruction sheet is pretty useless. You have to look at the drawings, read the text, and then decide if you have the right parts for the right area. I decided to print photos of a completed HO version of the kit for reference.
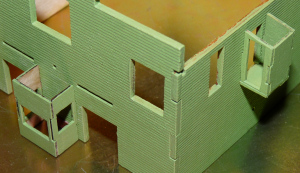
The next step was gluing the walls together. I have a metal tray I bought from Micro Mark a while ago that helps keep 90-degree angles while glue dries. I used simple white Elmer's glue applied with a toothpick. Once everything was dry, I added the front box office/ticket window and side doorway "boxes".
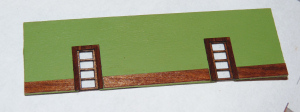
The kit comes with an inner wall that is to be glued behind the front side. Basically your N scale person buys a ticket at the ticket window, then enters through a front door. They find themselves in a small lobby, then go through a door in the inside wall, and into the theater itself.
I decided to stain the woodwork on this wall with a brown marker. I used scrap from the kit's carrier sheets to make wainscoting. Something tells me no one will see this detail, but at least I will know it is there!
While I had the metal tray out, I glued together the 4 parts that make up the basis of the marquee. This will end up being one of the last details I'll work on, but I figured it was as good a time as any to glue it together.
This page was last updated on: March 8, 2015
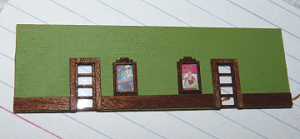
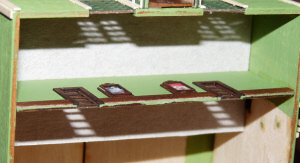
12/22/12 - Today the inner wall was finished by adding two of the kit's poster displays. I haven't decided yet what era of films this theater will be playing, though I am leaning toward it being a special-run house, so that any film can play at any time. That means I can add posters for my favorite films if I want! The frames are made up of a flat base, and a thin overlay. I used markers to stain the two different shades of brown, though the wall won't be easily seen once glued inside the building.
One thing I noticed about the outside box office was that the windows let you see the green clapboards behind the area a ticket seller would sit. This didn't look right, so I took a bit of scrap wood and stained it with a brown marker to make it look like wood trim. I added a few coats of Testor's gloss clear, then glued it to the wall of the booth. The thickness isn't in scale, but it shouldn't be too obvious from the outside. You can (sort of) see this detail in the photo at left.
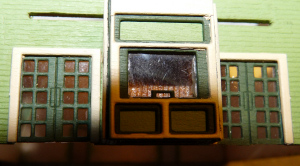
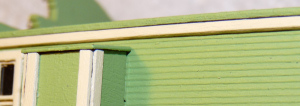
Since the walls of the building were all glued up, it was time to start adding the windows and trim. Photos of a built kit on Branchline Train's website show the windows painted in two colors. I did mine in just cream. I wish I had used regular acrylic, though, as the Poly Scale created buildup that is prone to chipping. The kit comes with a lot of trim that you attach in layers. As you can see at left, I needed a third color to paint these. I decided to go with Ceramcoat Forest Green.
When it came time to attach this trim to the box office, I found I had goofed when I glued together the three base walls. Even though I made sure I did it correctly, it became obvious I didn't, as the two smaller side walls don't match. You will see this later when I post photos of the finished building. Keep this little ooopsie in mind if you decide to build this kit!
12/22/12 - Today the inner wall was finished by adding two of the kit's poster displays. I haven't decided yet what era of films this theater will be playing, though I am leaning toward it being a special-run house, so that any film can play at any time. That means I can add posters for my favorite films if I want! The frames are made up of a flat base, and a thin overlay. I used markers to stain the two different shades of brown, though the wall won't be easily seen once glued inside the building.
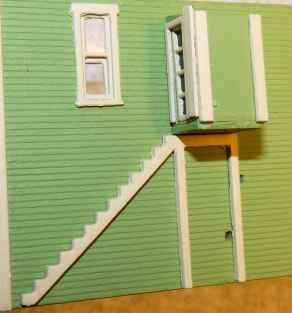
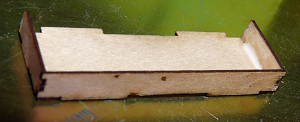
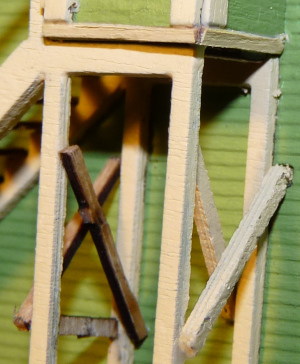
12/30/12 - This was the big day... STAIRS! I hate building stairs... they never come out quite right! I started by attaching the outside trim to the "box" that makes up the upper side door exit. As you can see in the first stair photo, this trim is a bit heavy for such a small area. Also, some of it needed to be... well... trimmed, later on. I may have to add some scrap to make the bottom edges look better. The small top panel was attached, and will get some form of roofing later.
Next I glued on one half of the stair sides. You can see two holes in the photo. This is where two braces attach. The instructions are vague on how this is supposed to happen, and I am not completely happy with the final look, so I may have goofed up a bit here.
I decided that since the cream paint seemed to have an adverse effect on the adhesive used on some parts, I decided not to paint the steps before attaching them. I may leave them alone, I'm not sure yet.
1/11/13 - Today the inside "lobby" wall was installed. The instructions say you can decide where to put it, so I pretended I was an N scale person and applied the glue! Also, I added a low-budget cardboard ceiling to the lobby area, cutting it a bit too long to provide a floor for the upstairs doorway that leads out to the stairs. I assume this area would be office and/or projector space.
I then decided to add some scrap wood to the outside stairway. I tried to match the kit bracing, which is only provided for the rear posts/legs. The stairs are almost done now, they just need a little more paint.
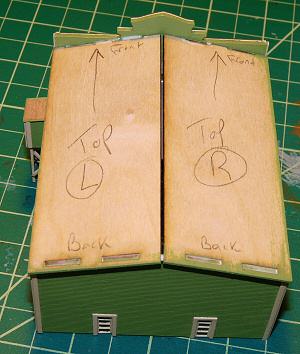
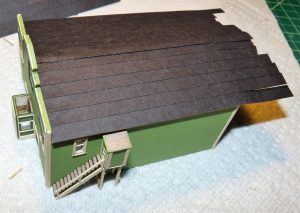
Next I glued on the two roof halves. I had already painted the edges where they overhang, and marked which side was which. The walls must be pretty close to square, as I had no real issues making them line up with the mounting areas. Now I have to decide what style roofing material I want to use!
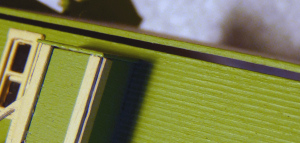
One thing I noticed was on the side walls where the roof overhangs, there is a gap of nothingness. So I took some scrap wood from the kit and painted it cream. I plan to add these under the overhangs as trim to block this open area. I don't understand why the gap is there, as all of the corresponding parts line up just right.
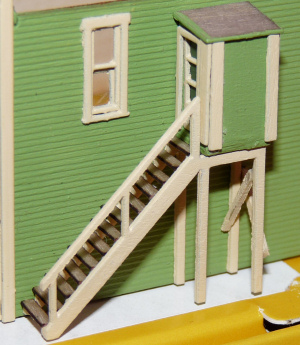
1/18/13 - At left you can see the gap left after gluing on the roof, and the trim I added to cover that gap. While not the most ideal fix, it sure is better than having that open space!
You can also see the wood bracing I added to the stairs, and horizontal trim. All of these bits need paint next.
I made some stand-in roofs with my computer to see what styles would look good on the theater. Shingles looked wrong due to the roof's very flat angles. So I decided to go with the kit's rolled roofing. Some companies provide a sheet of smooth white paper, laser cut into the right widths. You paint them and then apply directly to the roof thanks to the paper's adhesive. This kit instead provides a sheet of laser cut black paper. It is basically a thin construction paper. I think the look so far is a little too dark. I'll have to look into options for lightening it all up a bit, though I don't have experience with such a thing yet.
I think the building would look good with rain gutters. I don't know what to use to make them, though. I plan on asking on some model forums and see what other modelers have done.
Next up will be the marquee. This is something I don't have much first hand experience with!

BACK
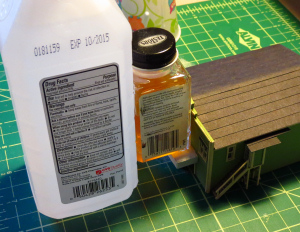
2/18/13 - Today I trimmed off the roofing at the back overhang, and added a small amount on the stairway roof. Then I glued on the marquee base... using a rather interesting looking technique to get it to dry straight! Even with all this precaution, it is still slightly bowed.
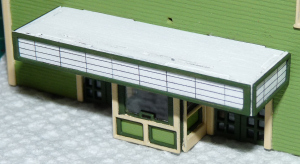
2/21/13 - Now that the marquee was installed, it was time to start thinking about the marquee faces. While thinking, I painted and installed the green outer frames. Since I still don't have a name for the theater, or a theme/era in mind, I decided to leave the marquee blank. I can always add lettering later.
The faces are covered in a grid pattern, which simulates the way real life letters attach. I couldn't find any real good measurements to go by, so I eyed it, using the kit's paper printout as a partial guide. My inkjet printer didn't like the lines being too close together. I am OK with the finished effect.
I think I may have to add some bracing to the top of the marquee, to make it look supported. Not sure yet. I am also still wondering about how I want to add the theater name.