12/2/10 - While browsing at a local craft store, I couldn't find a kit of anything I was interested in. But I knew from experience that if you look behind the models in the front row, you can find some nuggets.
What I found was a Revell 1964 Ford Fairlane. This isn't a car I know anything about, but I had never seen the kit before. It came with extra parts, and while I mulled over the $25 price tag, I decided to give it a go.
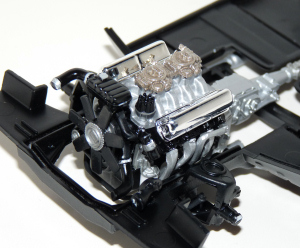
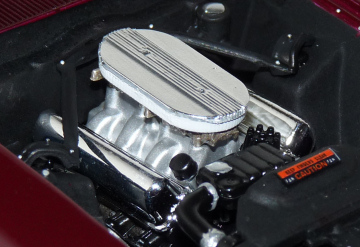
All of the reference photos I have found for '64 Fairlanes are either for 289 cars, sedans, T-Bolts, or customs. This kit comes with the 427 like the T-Bolt had. In fact, parts are included for that actual version of the car. I am not sure if the Fairlane came with that engine without being a T-Bolt.
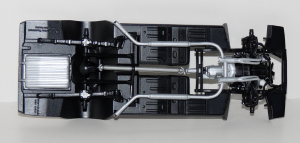
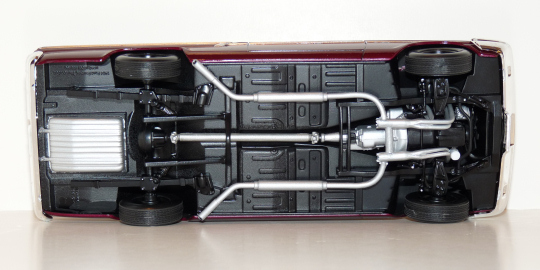
Unsure of exactly how the chassis should be painted, I sprayed it primer gray, then sprayed some semi-gloss black from far away, so make it look like undercoating. Most of the 427 engine photos I found are modern or custom, and were usually painted blue. But I found a couple of sources that stated the block should be black. I like the look, so even if this isn't totally correct, I can say it was a replacement block (HAHA!!). I was happy that the headers installed to the heads without much fuss...
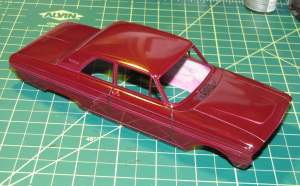
12/21/10 - I decided to go with Tamiya Maroon paint. So far, the color is not what I expected. Also, even though I primed it, the paint is not covering the edges. Also, the thing looks like it put out an ad for dust. Not sure what happened there. So, as usual, I am having paint issues. I just finished giving it a little polishing. I also added some black paint for the panel lines. I hope this will help when the next color coats are sprayed. The paint isn't covering the steel wheels well, either...
1/5/11 - The idea of painting the panel lines black before the final color coats worked rather well this time around. I spent some time yesterday adding the foil trim. I used Bare Metal Foil's aluminum, as my chrome sheet appears to be junk. Foiling is one of my least favorite tasks. One thing that has made the experience easier is my purchase of a package of cheap ladies makeup applicators. They are little plastic handles with soft foam tips. The only issue I have found so far is you have to watch which part of the applicator you burnish with, as you can rub through the metal. But it is far better than using Q-tips and getting lint all over. The body will now get some clear coats to seal everything.
At left you can also see how the Tamiya paint didn't cover the wheels very well. I decided to take a chance and flood some Detailer wash into them. Check back later to see how that worked out...
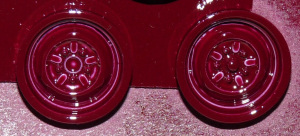
1/12/11 - OK, the wash didn't work well on the wheels. I have tried to strip the paint with: Super Clean (the purple stuff), Oil Eater, alcohol, and Windex. Not much success. I got them as clean as I could, then sprayed some semi-gloss black. Unfortunately, the surface isn't perfectly smooth. I have to decide if I still want to go with the steel wheels now...
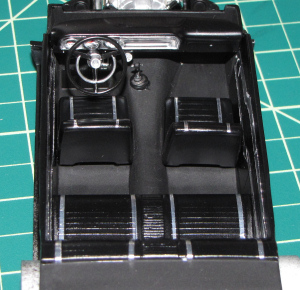
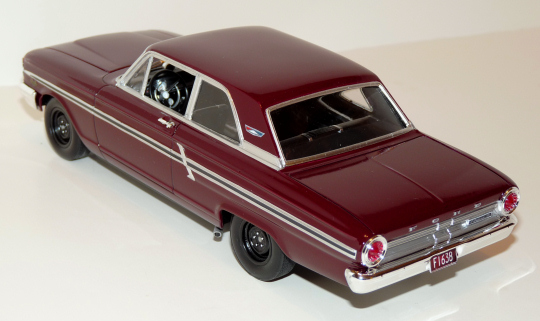
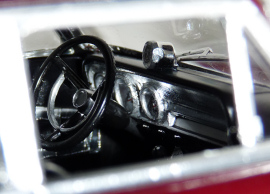
I have the interior just about finished. The front seat pattern doesn't match the back, so I had to go ahead and carry over the chrome seat piping to the back even though the molding is incorrect. Not perfect, but makes the interior pop a bit. Managed to get the metal foil into the dash with some success. The decal sheet includes 2 sets of gauge faces, in black and white. I used the white ones. The shifter appears to be an earlier Thunderbolt option. The inner door detail is all molded in and very vague. I tried foiling it according to some of the reference photos I had. Not happy with the results, but it is better than a big expanse of black paint...
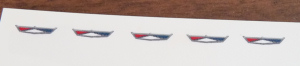
Made some decals for the side roof emblems. None are offered on the kit's decal sheet.
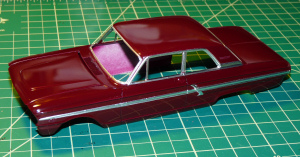
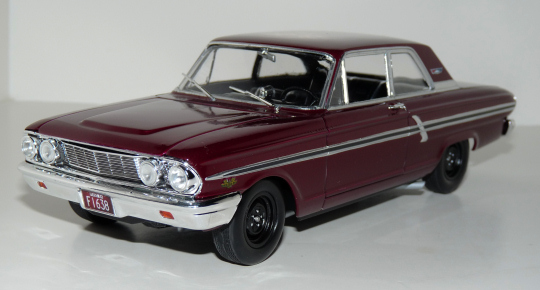
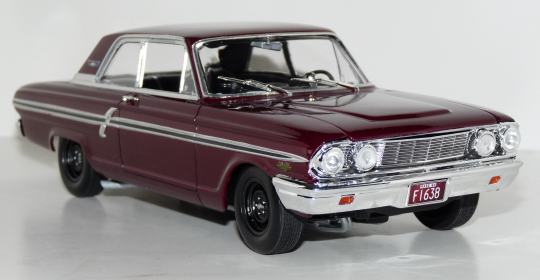
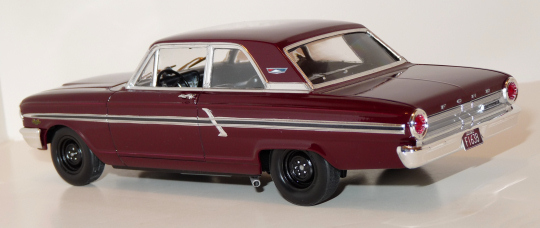
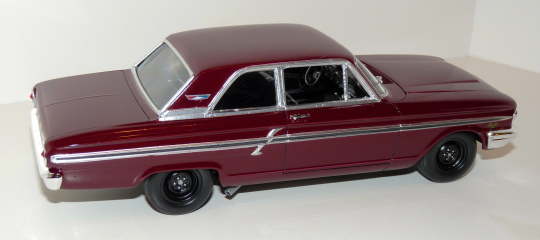
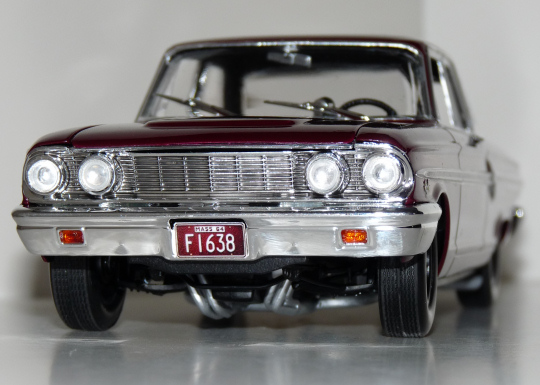
1/18/11 - The Fairlane is DONE! I decided to go with the plain steel wheels after all. I used a silver pen to pick out the lug nuts and paint on the bearing caps.
Word of advice to those planning on building this kit: make sure the front & rear suspensions are glued securely to the chassis. The front assembly with the wheel spindles popped off mine while trying to snap the wheels on.
I used a wash of acrylic black paint for the front grille. I tried it on the rear tailight surrounds, but it didn't come out right, so I washed it off. I had to make my own FAIRLANE 500 badge for the back panel, as the kit decal is for some reason gold and black instead of silver and black. The side badges worked out well. I decided to use the black side stripes. I did goof a little on the placement on one side... shhhhh... I decided not to put the F-O-R-D block letters on the hood edge. I think it looks cleaner without them. And since this is a sleeper-custom, I think I can get away with it.
I also have to use that excuse for the lack of a battery under the hood. I can say it is mounted in the trunk, race-car style. Though I may try to build one out of styrene. The air cleaner was stripped and foiled with matte aluminum BMF.
Mounting the bumpers was sort of a pain. The rear one is one piece, and installed well for the most part. The front has two parts, the upper grille with headlights, and the lower bumper. I had the top part installed just right, but somewhere along the line it got a little crooked. This possibly happened while struggling to get the bumper installed correctly. The amber turn signals are seperate clear parts, which is a nice touch. I used Tamiya clear orange on them.
The windows installed easily. I suggest using white glue or equivilant so the "glass" doesn't get marred or foggy. I had to touch-up my window foil job in a few spots, as foil and I don't get along well. The kit comes with an inside dome light, but no side view mirrors! All I can think is that the Thunderbolt, which this kit seems to be based on, perhaps didn't come with mirrors.
All in all this was a simple model to build. As usual the hardest part for me was the paint. Someone who wants to build a real hot-rod or period drag car should have a field day with this kit!