Revell Ferrari F430
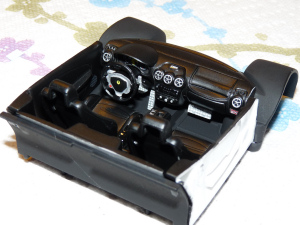
4/1/09 - Got the interior finished. There should be a third decal for the steering wheel, but the kit doesn't provide one. Ordered a photo etch detail kit as nothing remotely realistic is provided for the many open scoops and vents on the body.
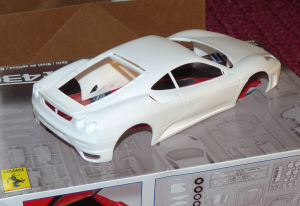
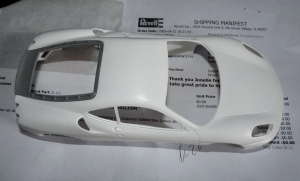
3/30/09 - Decided to build the Revell Ferrari F430 I had. Opened the box today. The body had a lot of mold lines, and I took various grades of sandpaper to it.
4/13/09 - Photo etch sheet has arrived. Today I shot the engine and engine brace (?) silver, started painting the valve covers and intake, and glued the interior to the chassis. My cheap clamps came in handy yet again...
4/13/09 - ... did a little test fitting to see it there would be issues down the road. I am now convinced this tooling is modified from either a snap kit, or a metal kit. There is a low parts count, almost snap-like assembly, and the body really snugs down into place. Next up is picking a color. I am leaning towards yellow, as I've always wanted to do a yellow Ferrari but have never found the right shade of paint in a can. We shall see...
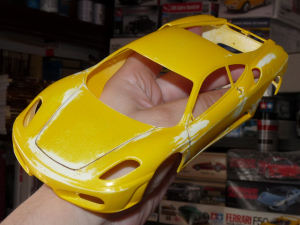
4/21/09 - Well folks, I can't win. Just can't. I decided to try my can of Tamiya yellow and while the paint sure seems nice, I made the mistake of trying to darken the panel lines with a thin black Sharpie prior to painting. Guess what? The black bled. YUP. Of course it did... I tried sanding off the bled areas, and re-sprayed. It bled a little more. So, once again, I have a body I can't use. I just ordered a spare body through Revell... or at least I THINK I did. The website didn't ask for any money or anything. I have a second kit, so AGAIN I may have to crack that one open and steal the body.
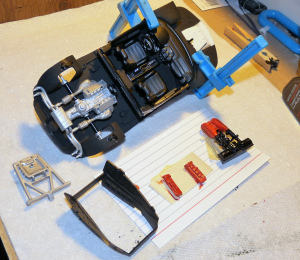
5/4/09 - I have had the F430 in a container of Castrol Super Clean because everyone says it strips paint really well. Not on THIS model! I will keep in in the bath a while longer and see what happens. In the meantime, I got a replacement body from Revell. So my second kit should be kept intact for the future. Yesterday I started painting the brakes, and the CSC did an amazing job stripping the chrome off the wheels. Today I started painting the wheels silver.
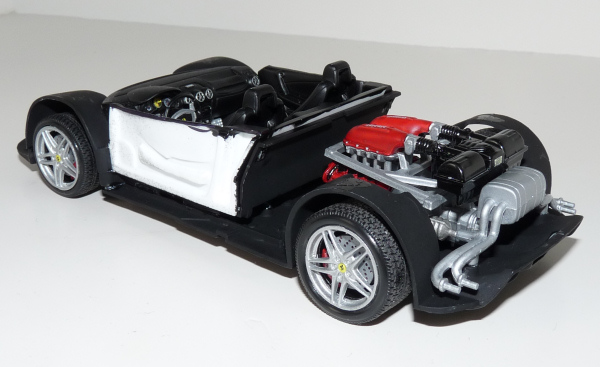
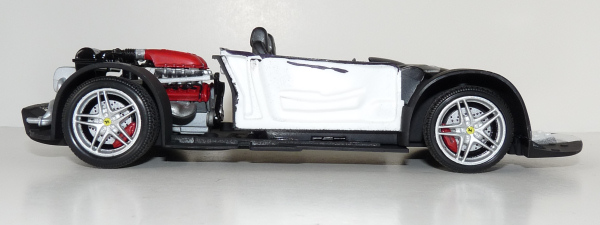
5/6/09 - Today I fought with the wheel/brake assemblies. Each rotor fits a certain way onto a spindle. But you have to sandwich them between the front and rear wheel halves. And because you need a lot of pressure to seat everything into the tires, you can't follow the directions and get a perfect result. Since I am not looking for perfection on this build, I am OK with the fact each rotor sits a little off from on the 1:1 F430. I like the little FERRARI decals for the calipers. Now that the chassis is pretty much complete, I have to start paying attention to the body again.
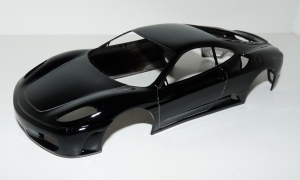
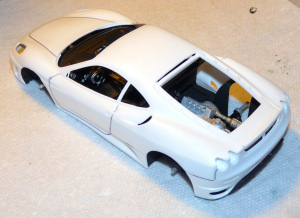
5/16/09 - I have finally gotten the courage to paint the replacement body. As you can see in the photo, I had to use the rear hatch from the Revell Germany version I have of the kit. No matter what I tried, I just could not strip the paint off of the original. I sanded down the mold lines on the body, but like a dope, didn't do anything about the small sink-hole on the hood. It is there because underneath is a large mounting pin. Also, the Tamiya black paint is real nice, but goes on so thin you can see sanding marks. This morning the car got its second coat. I still have no clue how I am going to get the front "gills" to be flat black. Not looking foward to THAT task...
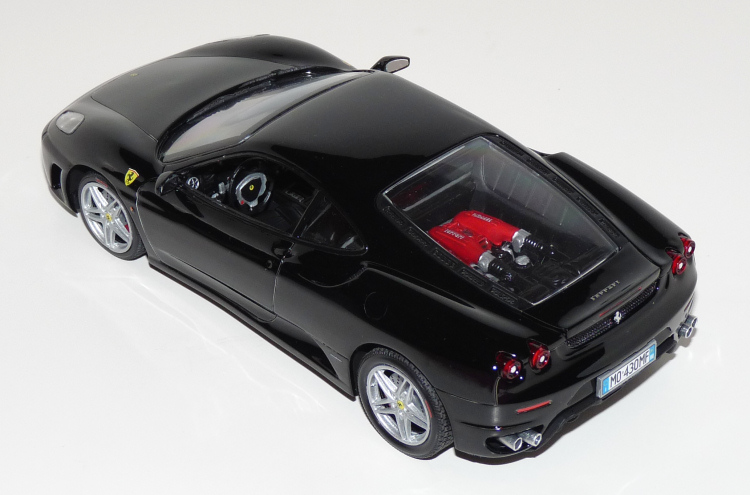

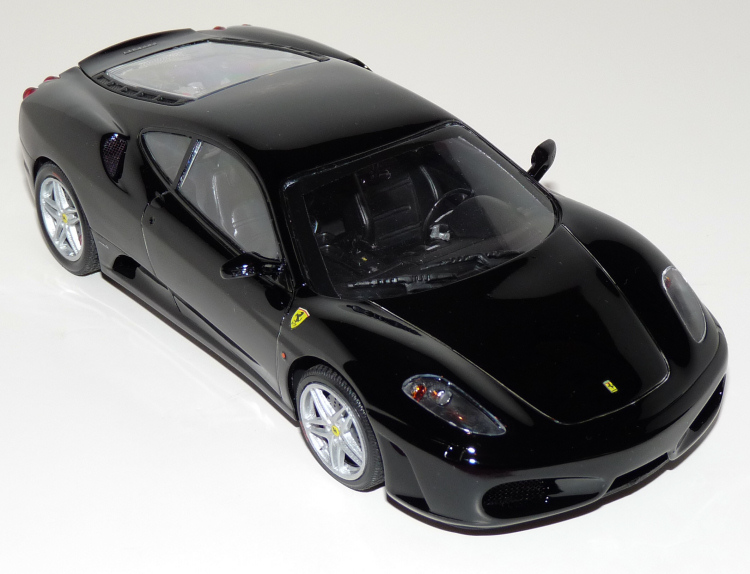

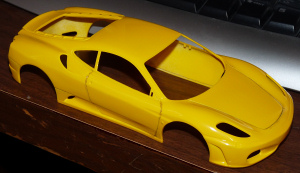
5/28/09 - The F430 is pretty much done. I decided not to try and make the nose snorkles flat black. The windows were a hassle, especially the windshield. It didn't fit well at all, and I had to use Super Glue, which I HATE to do, because it fogs everything. I cut the driver side window assembly so that people can see inside. During the harrowing body-to-chassis assembly (I had to really fight with it, but it finally seated correctly), that half window shifted and now isn't sitting right. ALSO, while trying to darken the panel lines, I wiped some of the thinned black paint I was using off the body, and it smudged the gloss paint. This kit must be the European version, as there are no side marker lights/reflectors on the decal sheet.
The panel lines still need to be painted, and I have no idea how I will do it now. Black wash didn't work.
On the bright side, the metal exhaust tips I cut look pretty nice. Also, the photo etch mesh really makes the car look nice. The headlight covers fit well. The rear of the car looks pretty nice!
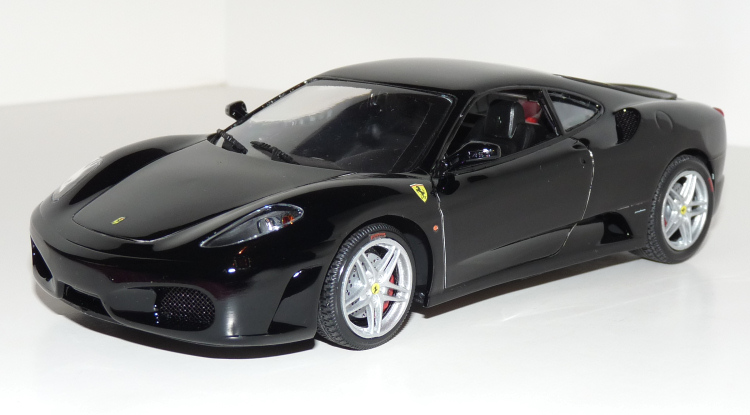
All in all, while not perfect, the overall look of the model is OK. As usual, there are issues I will dwell over that you can't see here online. If you decide to build this kit, fix the sink-mark on the front hood, prepare for issues with the windshield,and remember that the body and chassis DO fit together.

All model photos and commentary © 2013 Jonelle DeFelice unless noted otherwise. Please DO NOT COPY unless with permission