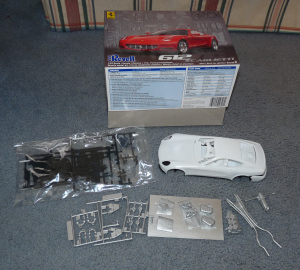
1/16/09 - On this day I cracked open the box, took a look at the parts, then sprayed all the flat black parts with Testor's paint.
1/17/09 - Today I sprayed the silver parts with Testor's flat silver.
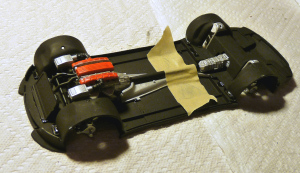
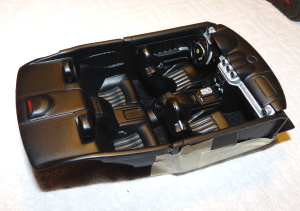
1/23/09 - By this point, I had the chassis assembled. As you can see, I had to use tape to keep the drive shaft in place while the glue dried. Things went together well otherwise.
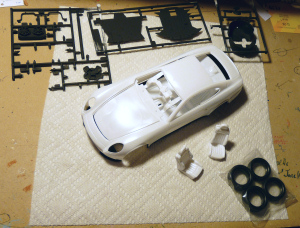
1/28/09 - Here is the completed interior. I went with simple black. I didn't use flocking for carpet, but did put some black felt floor mats in...
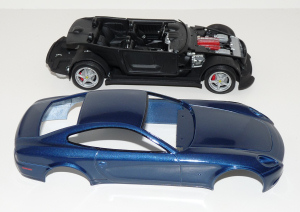
... I also did a mock-up to see how the body would look on the chassis.
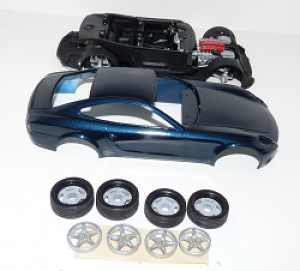
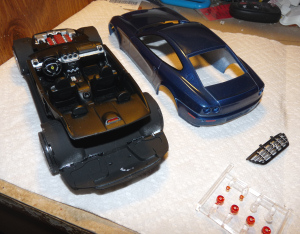
2/17/09 - Here we see the wheels for the first time. I stripped the chrome off with bleach. It was the first time I had tried to strip parts. The body had coats of Duplicolor primer and blue, and one of clear at this point. I polished out the clear coat and shot a second one, when distaster struck. The whole thing peeled. And when I used brake CLEANER instead of brake FLUID to try and save it, I got a plastic blob then went into the trash. Luckily I had a second kit. The folks on the Scale Auto boards convinced me to start again...
3/3/09 - Here we see the wheels installed. They come in two halves, with the brake discs sandwiched between. This setup is less than wonderfull... The completed look isn't what I wished for, but isn't all that bad, either.
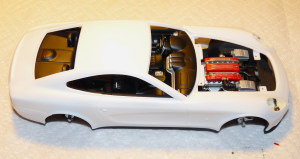
3/10/09 -This is body #2 with a silver base coat and a few color coats of Testors Arctic Blue. This was another mock-up to see how things were looking. It was then that I saw mating the body to chassis was going to be a pain...
3/30/09 - Body #2 all ready for a clear coat. I did a test on the side mirrors to see if the Duplicolor clear would work on Testor's paint. I was in luck, so I painted the black window trim and added the rear marker decals. I also painted the grille black with thin silver grating.
4/1/09 - Yesterday I sprayed the clear coat. The results are nice, though not perfect, as I didn't do any polishing or anything. At this point I was happy to have what I had. But this progress meant today I could move to my favorite part... final assembly!
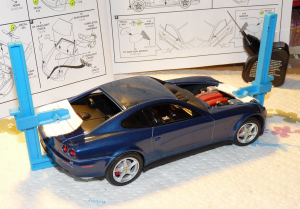
4/1/09 - The 612 now has front & rear lights installed, headliner painted black, and side windows. As expected, the body doesn't mate to the chassis well. So I used my 2 cheap clamps to try and keep things together while the glue dried. I am hoping I didn't make a huge mistake using index cards under the clamps. Will they leave a mark? Tune in later and see!!
4/2/09 - The two clamps did leave small marks on the clear coat. That is what happens when you rush things. I will try to polish them out. The body doesn't want to attach to the passenger side of the chassis. No clue what to do about THAT one...
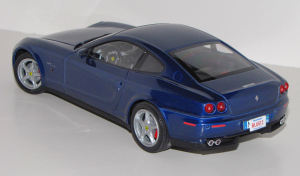
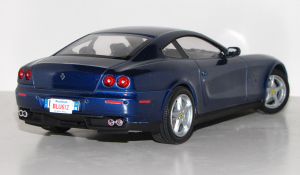
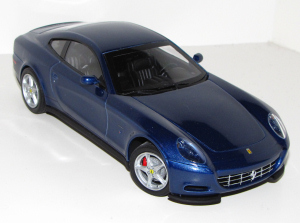


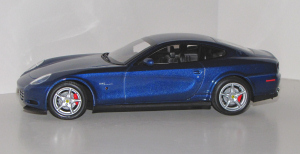
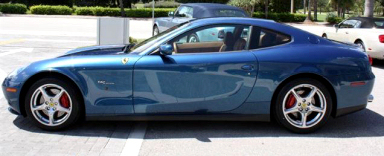
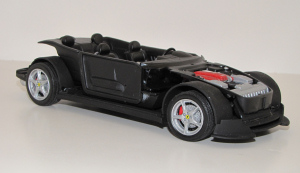
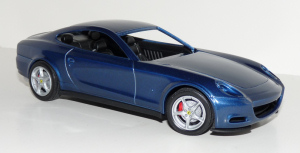
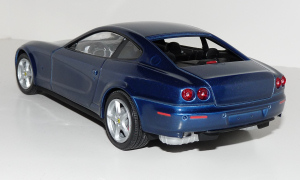
4/6/09 - The 612 is now finished! I had to use the spare kit I had for the windshield, as the first one got ruined by my blade while trying to cut it off the sprue. I used some photoetch emblems and made my own license plate. I had to use a nose emblem from my decal pile since the one in the kit was too big. All in all the model came out well, with the usual few ooopsies that prevent perfection. Below are some photos of the finished product.
Revell Ferrari 612 Scaglietti