9/20/11 - I cracked open this kit in February of this year. I finished the interior not too long after, then started painting the body. But then the kit was put aside for the spring & summer. Now, it is getting cool again, and today I decided to start working on the 'Vette again.
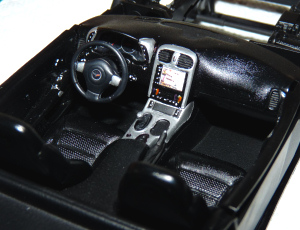
I am not happy with the semi-gloss black paint I used for the leather parts of the interior. It is way too shiny and not smooth. I'm hoping that once the body is attached, it will block some of the obvious glare. I also have to remember to add some carpet...
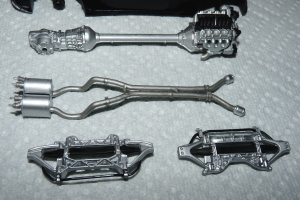
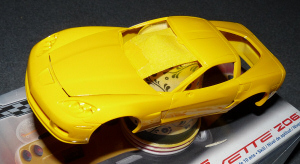
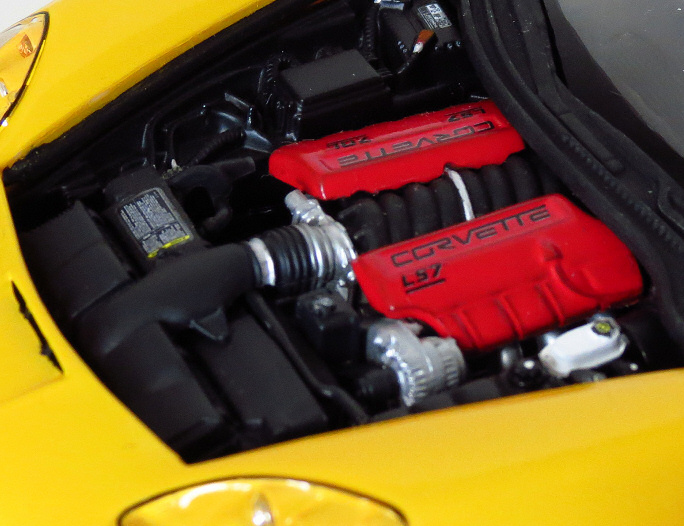
NOTE: When building this kit, make sure you use the ZO6 parts, since regular coupe parts are included as well.
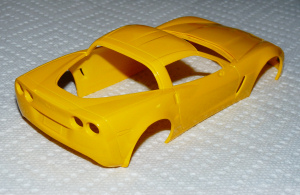
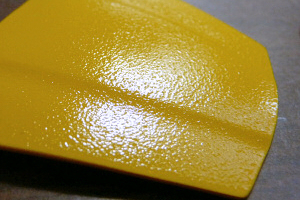
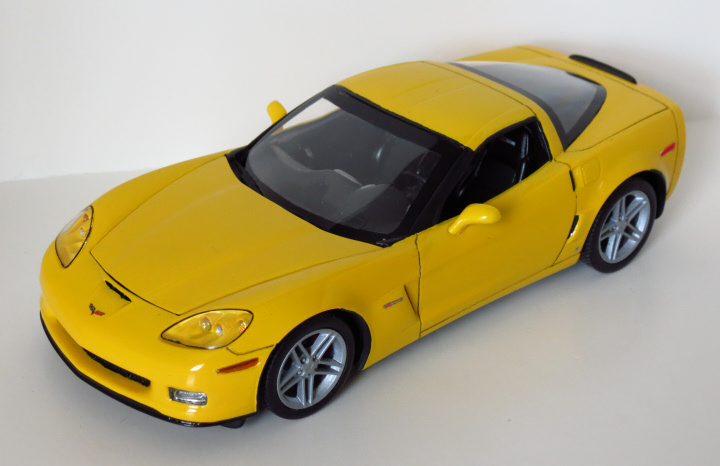
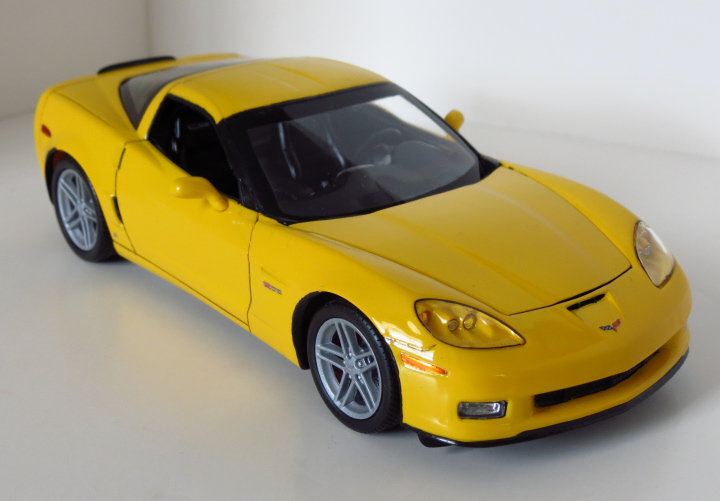
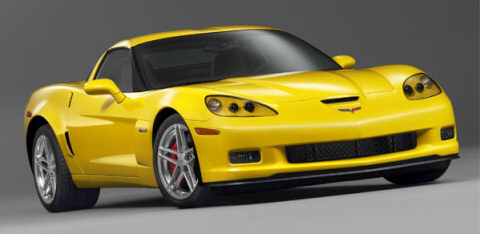
I am hoping that this will be the first successful yellow model I have done. I have found a decent yellow, a Tamiya shade, but it still looks wrong in certain light. There are about 3-4 coats on the body so far. NOT looking forward to painting the black trim... that is what will make me give up on the kit... stay tuned to see if I am right!
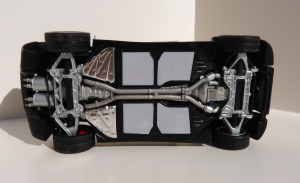
I have found varying images of chassis and engine parts. The kit's directions call for the engine to be painted black. I have not found a photo showing the aluminum engine painted black. The exhaust may have to be darker, but I think I will keep it steel unless I find a really good photo of a stock vehicle.
I think I have the front & rear suspensions pretty accurate. The chassis pan detailing will be next...
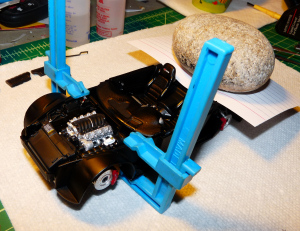
10/3/11 - The chassis is just about finished. Had to do some "fancy clamping" to get the interior glued to the chassis itself.
I sprayed the brake discs a semi-chrome color, then painted the calipers red, with the kit decals as a finishing touch. The simulated drill-holes I darkened using a thin-tip Sharpie.
I decided to go with regular painted wheels. I stripped the factory chrome off with Super Clean, then applied the silver and a few thin coats of clear. The lug nuts are chrome from a silver gel pen.
One of the underhood decals dislodged and is somewhere in my room, destined to drift around until vacuumed up or washed with my blankets. My ink-jet printer can't print such a small decal with proper detail, but I do plan on trying to replicate the jump-start sticker that is pretty obvious under the hood, but not included on the decal sheet.
I was worried about the chassis underside. But I think things turned out OK. I made some gray decals for the 4 panels under the passenger compartment. They seem to match the few photos I have of the underside of 1:1 cars. The chrome foil covers the heat/stone shields, but a matte foil may have been a more accurate choice.
The body has had one more coat of paint, and now needs some polishing, and maybe even MORE paint! Tamiya yellow is very thin.
11/13/11 - Things are on hold, as the body is messed up. Everything was going fine until I added two clear coats over the yellow. Everything got all bumpy and nasty.
10/19/12 - By this date, almost a year after I got disgusted with everything, I managed to find something to strip Tamiya paint. It was an old bottle of Plasti-strip by American Hobby Specialists, which appears to no longer be in production. It stripped off the yellow very well. I washed and sanded the body, then started spraying the yellow again. The result was FAR nicer than it looked before! Some areas were not perfect, but I was happy to have something to work with again.
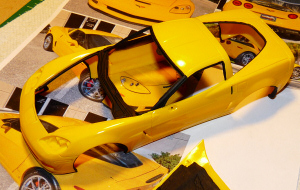
10/22/12 - Most of the black trim is painted. I really dislike this step. I decided to use craft acrylics, as they are more forgiving if you mess up. I was really worried about the front grill, as it is all molded in place. The little flares around the fenders were a trip-and-a-half, too. I decided to darken the panel lines with thinned acrylic, but the effect wasn't perfect due to the original paint not being totally removed in the recesses during srtipping. Once all the black was applied, I sprayed one clear coat to seal it all, as the acrylics can sometimes rub or scrape off. I tried the black Sharpie technique for the black areas on the windows, but it never works for me. The ink is more of a purple than black, and doesn't cover well. So I ended up applying black paint as well. Another part of model building I dislike...
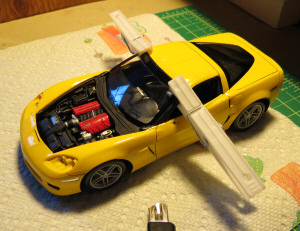
11/1/12 - Final assembly was pretty simple. The body and chassis meet well. Next was final detailing, which I usually enjoy. It makes the model start to look like a real car. At right you can see my high-tech clamping technique for glueing the windshield in place.
The kit comes with nice aluminum exhaust tips. I applied some black paint inside them before installing. Also, you will notice there are no turn signal/side marker decals. I applied metal foil to the molded in detail, then used a toothpick to apply coats of clear Tamiya red and amber paint.